
Java Installation
Learn how to download, install, and configure the tools needed to build Java applications on Windows and macOS

Software Developer
Java Installation and File Path Setup
In this article, we're going to download and install the necessary tools to build Java applications on both Windows and macOS. When developing Java projects, you have several IDEs to choose from. One popular choice is IntelliJ IDEA, which is widely used for Java development. In this tutorial, we’ll walk through the steps to set up a Java project using IntelliJ IDEA and configure the file path.
Step 1: Download and Install JDK
For Windows and macOS
Open your browser and search for "JDK download":
- JDK stands for Java Development Kit, which is a software development environment for building Java applications. It includes a compiler, a Java runtime environment, and other useful tools.
Visit the Oracle website:
- You should see a page for Java SE (Java Standard Edition). Click on this link.
Select your platform:
On the download page, you will see options for various platforms like Linux, macOS, and Windows. Choose the appropriate file for your operating system.
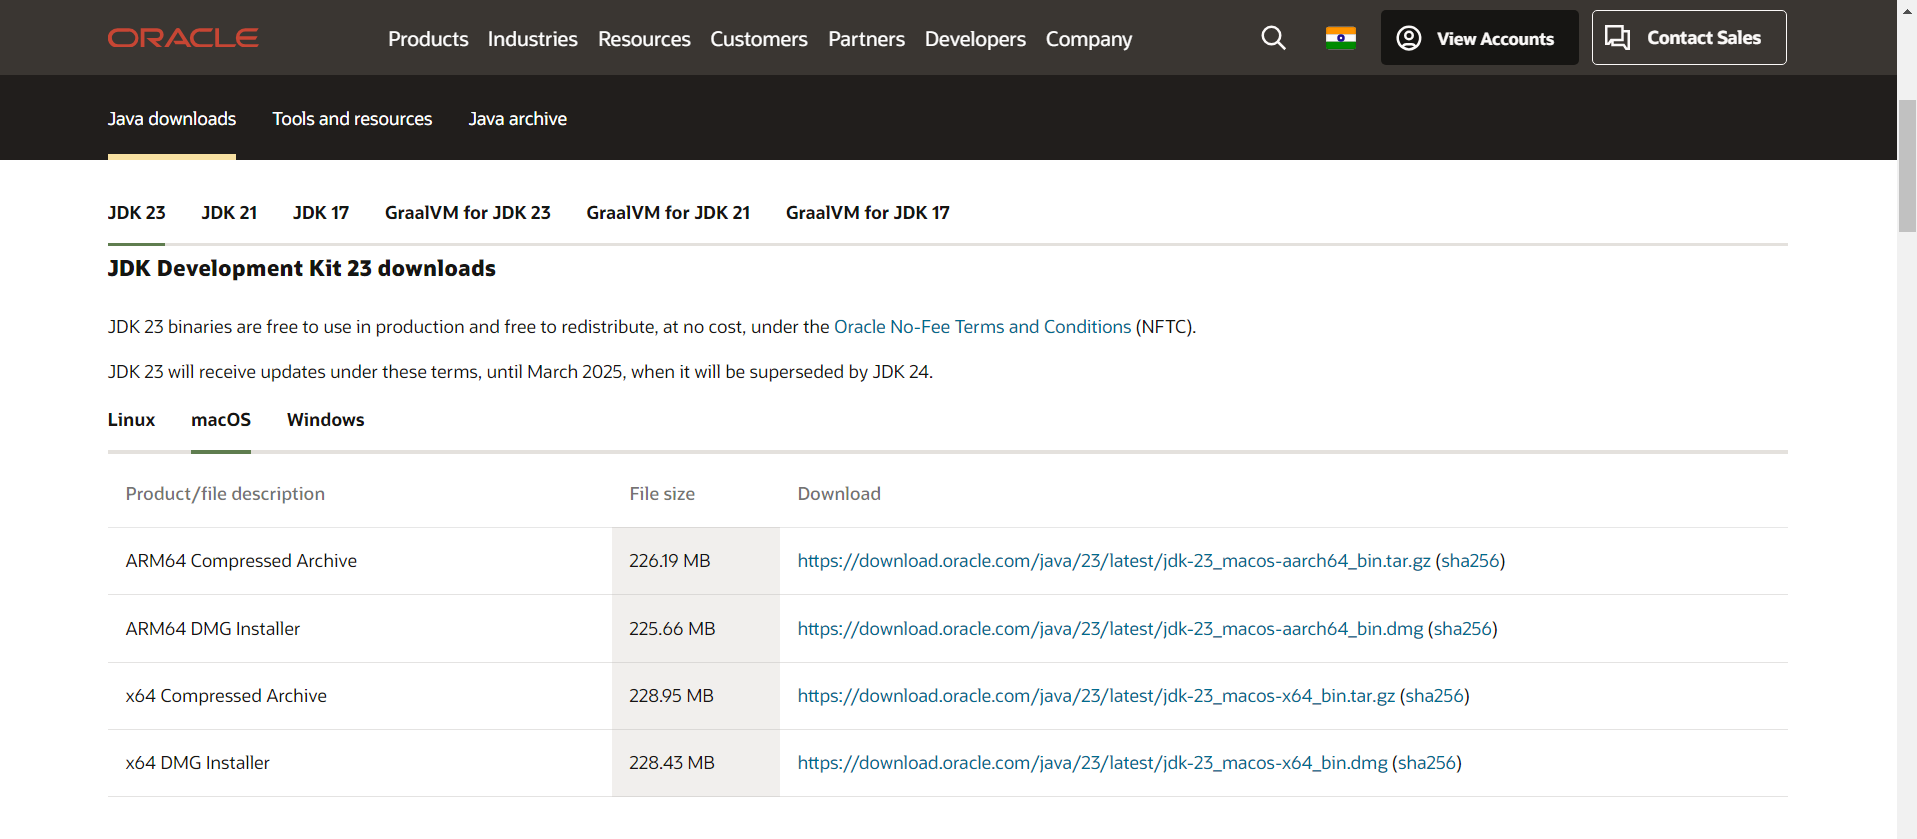
Accept the license agreement:
- Before downloading, you need to accept the license agreement.
Download the JDK:
- Click on the download link for the appropriate file. Once the download is complete, open the file.
Install the JDK:
For Windows: Double-click the installer file to open the installation wizard. Follow the prompts by clicking "Next" and "Install". You may need to enter your computer's password to proceed.
For macOS: Double-click the
.dmgfile to open the installation wizard. Follow the prompts by clicking "Continue" and "Install". You may need to enter your computer's password to proceed.
Finish the installation:
- Once the installation is complete, you can move the installer to the trash (for macOS) or delete the installer file (for Windows).
Step 2: Download and Install a Code Editor
There are many code editors available for building Java applications. Some popular ones include NetBeans, Eclipse, and IntelliJ IDEA. In this article, we'll use IntelliJ IDEA.
For Windows and macOS
Search for IntelliJ IDEA download:
- Open your browser and search for "IntelliJ IDEA download".
Visit the JetBrains website:
- Click on the link to download IntelliJ IDEA.
Download the Community Edition:
- The Community Edition is free and sufficient for learners. Click on the download link.
Install IntelliJ IDEA:
For Windows: Once the download is complete, run the installer and follow the prompts to install IntelliJ IDEA.
For macOS: Once the download is complete, drag and drop the application into your Applications folder.
Open IntelliJ IDEA:
- Launch the application to ensure it is installed correctly.
Step 3: Set Up File Path for Java Compiler
To ensure that your Java project runs smoothly, you need to set up the file path correctly.
For Windows
Locate the Java Compiler:
- The Java compiler is usually located in the
bindirectory of your JDK installation. For example, it might beC:\Program Files\Java\jdk-<version>\bin.
- The Java compiler is usually located in the
Set the Path Environment Variable:
Open the Start Menu and search for "Environment Variables".
Click on "Edit the system environment variables".
In the System Properties window, click on the "Environment Variables" button.
In the Environment Variables window, find the "Path" variable in the "System variables" section and click "Edit".
Click "New" and add the path to the Java compiler (e.g.,
C:\Program Files\Java\jdk-<version>\bin).Click "OK" to save the changes.
Verify the Path Setup:
- Open Command Prompt and run the following command:
javac -version
- You should see the version of the Java compiler printed in the terminal.
For macOS
Locate the Java Compiler:
- The Java compiler is usually located in the
bindirectory of your JDK installation. For example, it might be/Library/Java/JavaVirtualMachines/jdk-<version>.jdk/Contents/Home/bin.
- The Java compiler is usually located in the
Set the Path Environment Variable:
Open your terminal.
Edit your shell profile file (e.g.,
.bash_profile,.zshrc, or.bashrc) using a text editor. For example:
nano ~/.zshrc
- Add the following line to set the path to the Java compiler:
export PATH=$PATH:/Library/Java/JavaVirtualMachines/jdk-<version>.jdk/Contents/Home/bin
- Save the file and reload the shell profile:
source ~/.zshrc
Verify the Path Setup:
- To verify that the path is set up correctly, run the following command in your terminal:
javac -version
- You should see the version of the Java compiler printed in the terminal.
Conclusion
You have now installed all the necessary tools to build Java applications on both Windows and macOS. The Java tutorial page lists down all the important topics you can go through to get a deeper understanding of the language basics and advanced concepts.


